ITD WORKSPACE INSTALLATION PROCESS FOR CONSULTANTS SECTION 1 –
COMMENT UTILISER LE LOGICIEL INTERWRITE WORKSPACE 7500030 ? LACREATE WORKSPACES AND ADD VIEWS YOU CAN CREATE
INSITE QUIKR PASSWORD GUIDANCE TO LOGIN TO GSA WORKSPACES
ITD WORKSPACE INSTALLATION PROCESS FOR CONSULTANTS SECTION 1 –
MOTION PLANNING FOR DEFORMABLE WORKSPACES AND ITS APPLICATION TO
SUB CLICK(SOURCE AS BUTTON) DIM WORKSPACE AS NEW NOTESUIWORKSPACE
ITD Workspace Installation Process for Consultants
ITD Workspace Installation Process for Consultants
Section 1 – Server Setup
The following process is required to properly install and use the ITD workspace. This workspace is very customized and specific to the processes at ITD. However, this workspace has been designed understanding that you have a need to use MicroStation and InRoads without the ITD workspace and thus does not take over your MicroStation installation. You will be able to easily start either the ITD workspace or the default MicroStation workspace by selecting a different icon.
The following actions should be completed on a file server that is accessible by everyone in your organization that will use the ITD workspace. If you do not have a network or are setting the ITD workspace up on a single computer, please review Appendix A before continuing.
Setup Server folders
Create an empty folder that will store the ITD Projects Files.
Share the folder created for the ITD Projects Files. Make certain
that users have read/write access to this share.
This
folder should be mapped to the P: drive on the local machines.
Extract the ITD_Workspace.zip file to the file server. This zip file will create a new folder named ITD_Workspace that will contain all of the necessary files for the ITD workspace.
Share the ITD_Workspace folder. Make certain that users have
read/write access to this share.
This folder must be
mapped to the S: drive on the local machines.
This is
important because there are several areas within the MicroStation
and InRoads workspace that look for the S: drive mapping and these
portions of the software cannot be mapped using a more flexible URL
scheme at this time.
Each user working in the ITD Workspace must have unique resource files for their personal environment. These files include AccuDraw short cuts, Function Key menus, MicroStation Interface, User Preference File, and DWG translation definitions.
Run the batch file S:\User_Workspace\Create Users.bat
When prompted, enter the Windows login for the person who will be logged in when running MicroStation and InRoads with the ITD Workspace. The appropriate folders and files for the new user are created in the S:\User_Workspace\Users\ folder.
Repeat this process for each user who will be working in the ITD Workspace.
Section 2 – Local Workstation Setup
The following process is required to properly install and use the ITD workspace.
Map network drives
Share the folder created for the ITD Workspace. This folder must be
mapped to the S: drive on the local machines.
This is
important because there are several areas within the MicroStation
and InRoads workspace that look for the S: drive mapping and these
portions of the software cannot be mapped using a more flexible URL
scheme at this time.
Share the folder created for the ITD Projects Files. This folder should be mapped to the P: drive on the local machines.
Software
Power InRoads. As of the date this document was published, ITD is using version 08.11.09.845. Please check with ITD to verify if this is the correct version.
After the software is installed, it must be configured to work with the ITD Workspace.
Copy the file S:\Software\Local_CFG_File\ITD_Standards_Local.cfg
to the folder C:\Program Files\Bentley\MicroStation\config\appl\
or equivalent folder if MicroStation was installed to a different
drive or folder.
This configuration file facilitates
MicroStation to use the ITD Workspace. However, it does not
automatically enable the ITD Workspace. To enable the ITD Workspace
you must also complete the following steps.
Create a copy of the Power InRoads icon and label it ITD Power InRoads.
Right-click on the new icon and select Properties. Add the
switch –ws ITD USER=1 to the target on the shortcut tab
as illustrated in the following example:
"C:\Program
Files\Bentley\MicroStation\ustation.exe" -ws_ITD_USER=1
*Note - Your path to MicroStation may vary based upon your
installation location.
Use this icon to start MicroStation or InRoads using the ITD workspace. Using the original MicroStation icon, the Start menu, or double clicking on a DGN file will start MicroStation without the ITD workspace.
Copy the Quantity Manager configuration file S:\Software\Local_CFG_File\qm.cfg to the folder C:\Program Files\Bentley\InRoads Group V8.9\QM\classes| or equivalent folder if InRoads was installed to a different drive or folder.
Appendix A – Working without a File Server
If you are installing the ITD Workspace on a single computer and not using a client-server configuration you need to simulate the server environment. If your computer does not have a network card or you are not currently connected you may need to use the Microsoft Loopback adapter.
The following instructions are for Windows XP and are taken from Microsoft KnowledgeBase article 839013.
To manually install the Microsoft Loopback adapter in Windows XP, follow these steps:
Click Start, and then click Control Panel.
If you are in Classic view, click Switch to Category View under Control Panel in the left pane.
Double-click Printers and Other Hardware, and then click Next.
Under See Also in the left pane, click Add Hardware and then click Next.
Click Yes, I have already connected the hardware, and then click Next.
At the bottom of the list, click Add a new hardware device, and then click Next.
Click Install the hardware that I manfully select from a list, and then click Next.
Click Network adapters, and then click Next.
In the Manufacturer box, click Microsoft.
In the Network Adapter box, click Microsoft Loopback Adapter, and then click Next.
Click Finish.
Revised July 2015 Page
W EBBLENDER QUICKSTART GUIDE T WORKSPACE TOOL PALETTE TOOLBAR
Tags: consultants section, consultants, workspace, process, section, installation
- OGÓLNE WYMAGANIA DLA GOSPODARSTW PRODUKUJĄCYCH MLEKO SUROWE 1) OGÓLNE
- H RVATSKA GOSPODARSKA KOMORA ŽUPANIJSKA KOMORA PULA KLASA 340041502308
- REGLAMENTO GENERAL PRUEBAS POR ETAPAS REGLAMENTOS DE CARRERA REAL
- PLNÁ MOC JÁ NÍŽE PODEPSANÝ(Á)………………………………………………………………………… (ZMOCNITEL JMÉNO A
- ĮVYKO PIRMASIS NAUJAI IŠRINKTOS JAUNIMO REIKALŲ TARYBOS POSĖDIS RUGSĖJO
- ACCESIBILIDAD EN LOS PORTALES UNIVERSITARIOS LA ACCESIBILIDAD DE LOS
- ORDENANZA FISCAL REGULADORA DEL IMPUESTO SOBRE EL INCREMENTO DE
- MINIMALLY INVASIVE SURGERY FOR BONE RECONSTRUCTION THROUGH THE METHOD
- CLEI TIEMPO GUIA DE APRENDIZAJE Nº NOMBRE DE LA
- COLEGIOS MAYORES DE TITULARIDAD PROPIA NORMAS DE CONVIVENCIA COLEGIAL
- LIGHTSPACE PLAY FLOOR COMES TO THE CLASSROOM ANDREW HUBER
- 8 TALLER DE ORIENTACIÓN VOCACIONAL PROGRAMA DE
- STANOVY ZAPSANÉHO SPOLKU PADMA ČL I NÁZEV A SÍDLO
- GUÍA PASO A PASO DE CÓMO HACER EL PLANO
- DNA EXAM PRACTICE QUESTIONS 1 THE MONOMERS OF DNA
- REVISTA MÉDICA ELECTRÓNICA 200628 (6) CLÍNICA ESTOMATOLÓGICA DOCENTE “III
- MRSA FAQS WHAT IS MRSA? MRSA IS SHORT FOR
- ZAŁĄCZNIK NR 5 DO REGULAMIN REKRUTACJI I UCZESTNICTWA W
- THE METROVERDE GREEN ROOF PANEL (MV GRP) IS A
- “LA PALABRA SE HIZO CARNE Y PUSO SU MORADA
- SOLICITUD DE ATENCIÓN EDUCATIVA DOMICILIARIA (PADREMADRE O TUTORA LEGAL)
- C OLÉGIO “MARQUÊS DE MONTE ALEGRE” CIRCULAR 310
- PENNSYLVANIA GAME COMMISSION SPECIFICATIONS FOR A 350 GALLON WILDLAND
- FAQ URČENIA ÚHRAD ZA PRÍSTUP K K ŽELEZNIČNEJ INFRAŠTRUKTÚRE
- TBMM BASIN BÜROSU’NDA MEDYA TEMSILCILERINE DAĞITILAN METINDIR 15 ARALIK
- REGULAMIN PRZETARGU PISEMNEGO NR GCR12W2011 NA SPRZEDAŻ URZĄDZEŃ ENERGETYCZNYCH
- DEPARTAMENTO DE ASUNTOS DE VETERANOS PROGRAMAS PARA MODIFICACIONES DE
- CITY ENVIRONMENTAL QUALITY REVIEW NEW YORK CITY TYPE II
- ESCUELAS FRANCESAS FECHA PLAN DE AUTOPROTECCIÓN ESCOLAR
- POČINJE BOK! OTVORENJE – PONEDJELJAK 3 SVIBNJA U 10
 k Alteen Erreklamazioa Ondarearen Gaineko Erantzukizunagatik Reclamación de Daños
 SU HAYWARD SUFFOLK COUNTY COUNCIL START SPIDER 2 ADJECTIVES
BUILDING NO SC PROJECT NAME SECTION 210548 – VIBRATION
COMPLETE BIODATA NAME SHRI PRAVEEN KUMAR IDENTITY NO
KENTSEL TASARIM PROJELERİ YAKLAŞIK MALİYET HESAPLAMA YÖNTEMİ MADDE 1
ŽÁDOST O UZNÁNÍ ZKOUŠEK A ZÁPOČTŮ ŽÁDÁM O
 CONTRATO DE SERVICIOS RELACIONADOS CON LA OBRA PÚBLICA NO
NATIONAL MARK OF MALAYSIAN BRAND CERTIFICATION SCHEME FROM NOV
 J NOUSHARD ENGLISH TAMIL TAMIL ENGLISH SINHALESE
 OFFICE OF INSURANCE REGULATION MARKET INVESTIGATIONS APPENDIX E CLAIMS
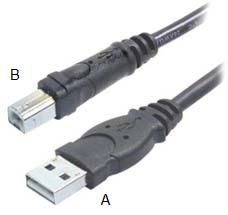 FIREWIRE (IEEE1394) O USB 20 USB 20 LOS PUERTOS
 CHAPTER 5 OUTLINE RESPONSES TO DISCUSSION QUESTIONS 1 ‘IF
ZAPISNIK 1 REDNA SEJE ČLANOV UO PGD SPPOLSKAVA KI
 17 DER SCHÜLER IST VERPFLICHTET DEN UNTERRICHT PÜNKTLICH UND
 PRÁCTICA 3 PROPORCIONALIDAD UNA FORMA ELEMENTAL DE LA NOCIÓN
 107076 МОСКВА МАТРОССКАЯ ТИШИНА Д 23 СТР1 ТЕЛФАКС (095)
 PEARSON EDEXCEL GCSE IN RELIGIOUS STUDIES SCHEME OF WORK
 RESPONSE TO CALL FOR EVIDENCE ISSUED BY COMMISSION ON
COURSE NAME TEXTILES II COURSE CODE IFA 2109 COURSE
PUBLICADO EN LA GACETA OFICIAL DEL DISTRITO FEDERALEL 25
