Z2 COULTER COUNTER OPERATION FOR QUANTIFYING CORN POLLEN PRODUCTION
FOR IMMEDIATE RELEASE CONTACT YVES COULTER PUMA INTERNATIONALFROM ROXANNE COULTER EDC MEETING MINUTES 32905 THE FINAL
PO 791S08 – 10916 DODATEK Č1 BECKMAN COULTER ČESKÁ
PRIESTLY COMMON LIFE AND ASSOCIATIONS BY GARY COULTER THE
Z2 COULTER COUNTER OPERATION FOR QUANTIFYING CORN POLLEN PRODUCTION
Coulter Counter SOP
Z2 Coulter Counter operation for
Quantifying corn pollen production
Department: Agronomy
Created by: Agustin Fonseca and Sebastian Schneider
Laboratory: Crop Production & Physiology
Supervisor: Mark Westgate
Lab Supervisor: Maria Hartt Eckerman
Overview
The Coulter counter provides the ability to count particles (in this case, pollen grains) relative to user-defined thresholds. This protocol briefly describes the start up procedure, calibration of the machine, operation and sample analysis, and shutdown procedures. For more details, the Beckman Coulter Z series manual is located in a drawer underneath the machine (page references are provided in this guide).
Start up procedures
Before turning on the Coulter counter be sure that the waste jar is empty and that the diluent jar is full with Isoton II diluent (page 2-13). Waste Isoton II diluent can be disposed of in the sink with abundant water.
Pollen counting requires a 200 m aperture tube. If a different aperture is in place, replace it with the 200 m (pages 2-15 and 4-19). Currently this is the only aperture we have, so this step is not required.
Turn on the Coulter counter.
Calibration (page 3-1)
Beckman recommends that the user check the size calibration for each aperture tube at least once a month to monitor for any system variations. However, when a lot of samples are being analyzed, we recommend doing so more frequently.
Prepare a calibration suspension by adding 5 drops of the 10 m standard into a beaker containing 50 ml of Isoton II diluent.
Place the beaker of the calibration suspension on the platform and raise it until the aperture tube, electrode and stirrer are immersed.
Turn on stirrer (knob on top front of Coulter counter); adjust speed to a gentle but thorough stir (stirrer will automatically stop when platform is lowered).
Press Set-up and screen S1 will display. At Selected units select m by using the cursor keys.
Press Set-up and screen S2 displays. At Select Aperture use the cursor key to select 200 m. At Metered Volume select 1.0 ml.
At screen S1, press CAL and screen C1 will display. At Selected units select m and at Calibrator size use the numeric keypad to enter 10 m. The Measure Aperture field automatically changes to Yes.
Press Start and screen C4 will display followed by screen C3.
Press Start again and screen C6 will display. Wait until the calibrating process is over.
Once calibration is complete, the C7 screen will display. Press Start to store the new Kd.
Operation and sample analysis
Raw pollen samples are normally too concentrated to be quantified directly, so dilution is required. Too low concentrations are not desirable either, as they result in lower accuracy. Choosing the correct dilution factor will depend on the operator criteria and experience. We recommend targeting for a concentration around 1000 pollen grains per ml.
Prepare pollen dilutions (in Isoton II diluent) in a 150 ml glass beaker. Make sure to shake the pollen sample solution until the dispersal of pollen grains is homogeneous prior to pipetting out the pollen sample. IMPORTANT: Initial sample volume needs to be known for calculating total number of pollen grains.
Press Set-up until screen S1 displays. Check that the Aperture tube is set to 200 m. Set up the Upper Size Tu to 90 m and the Lower Size Tl to 50 m. Set up the Count Mode to ‘between’ (page 4-2).
Press Set-up and screen S2 will display. Be sure that Metered Volume is 1.0 ml.
Press Output and screen A1 will display. In Result type field select between Count and Concentration. Keep in mind that If Count is selected the output will show the number of pollen grains measured in one ml of the diluted concentration. If Concentration is selected the dilution factor is required (page 4-7).
Place the beaker with the pollen dilution on the platform and raise it until the aperture tube, electrode and stirrer are immersed. Stirrer should be on and running at a gentle but effective speed.
Press Start to initiate an analysis. Screen A2 will display while counting, until 1 ml of sample has been analyzed, and output screen A3 (Concentration) or A4 (Count) displays.
Output can be saved to the adjacent computer (see Saving data) or typed by hand. In any case, be aware that pressing Start will initiate another counting and replace the previous information.
In some cases, the aperture can be obstructed by pollen clumps or other impurities. This will be evident when looking through the aperture-viewing screen. In most cases, pressing Stop will be sufficient to unblock the aperture and the sample needs to be recounted by pressing Start. If the aperture remains blocked there are two options. Cleaning the orifice by using a small brush or flushing the aperture (page 7-4).
Saving data
Turn on the computer and open the Z2 AccuComp software (there’s a shortcut on the desktop).
Before acquiring data from the Coulter counter select the ‘Enter Sample Info’ icon from the toolbar to enter the sample info.
Enter
Sample Info Acquire
Data from Z2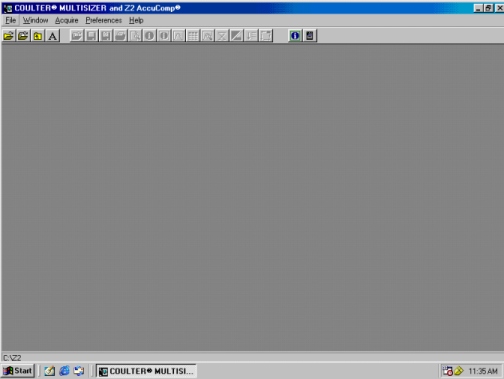


Select the ‘Acquire Data from Z2’ icon from the toolbar. The software will acquire the information displayed on the coulter counter screen. A Saving window will automatically open. Select the directory in which you want to save your file and re-check the file name.
Press Save, wait until computer have finished acquiring the data and close the output window. You are now ready to run the next sample.
Reports can be printed.
Files are only accessible by using the Z2 AccuComp software.
Shutdown procedures (page 4-16)
It is recommended to prime the aperture at the end of the day. Replace the last sample with a new beaker with 50 ml of Isoton II diluent. Press Functions and screen F1 will display. At the line Prime/Fill/Drain/Flush/ Vent, use the cursor key to select Prime Aperture. Press Start two times to initiate the process. At completion, screen F1 is again displayed with the status Aperture Primed (page 4-21).
Turn of the coulter counter.
Place a beaker with cleaning solution or Isoton II diluent on the platform and raise it until the aperture tube, electrode and stirrer are immersed. The aperture tube NEEDS to remain submerged.
Clean the coulter counter as appropriate as well as beakers and other materials used. Return used materials to their original places.
Remember to sign in the Coulter Counter user log sheet.
If you need assistance with the Coulter counter or supplies, or have any further questions please contact Maria Eckerman.
Tags: coulter counter, the coulter, pollen, coulter, counter, operation, quantifying, production
- PATVIRTINTA MARIJOS IR JURGIO ŠLAPELIŲ NAMOMUZIEJAUS DIREKTORIAUS 20101220 ĮSAKYMU
- BIJZONDER ONDERZOEKSFONDS SPECIAL RESEARCH FUND STARTKREDIET WETENSCHAPPELIJK VERSLAG
- EK3B ATİPİK HEMOLİTİK ÜREMİK SENDROM (AHÜS) HASTALARINDA ECULİZUMAB KULLANIMI
- GUVERNUL ROMÂNIEI MINISTERUL MEDIULUI MINISTERUL FINANŢELOR PUBLICE NR
- PLAN DE CONTINGENCIA FRENTE A LA CRISIS SANITARIA OCASIONADA
- M ARAVILLAS DEL ESTE INCLUYE TRASLADOS AEROPUERTO –
- AJUNTAMENT D’ESPARREGUERA CANVI DE TITULARITAT DEL TÍTOL HABILITANT D’ACTIVITAT
- ICCC 2012 CONFERENCE BOOKING FORM (GUEST ROOM ONLY) TO
- 1 ŻG833152017 KIELCE DNIA 10082017R INFORMACJA O
- VEKTOROVÁ ANALÝZA ÚKOL VYBRAT V ZÁJMOVÉ OBLASTI MAPOVACÍ ČTVERCE
- LA IMPORTANCIA DE LA TRANSPARENCIA DEL SECTOR PÚBLICO Y
- AHRC2635ADD1 UNITED NATIONS AHRC2635ADD1 GENERAL ASSEMBLY DISTR GENERAL 23
- NAZWA ZAJĘĆ GENETYKA POPULACJI ECTS 6 NAZWA ZAJĘĆ W
- O ACERVO DO ARQUIVO HISTÓRICO DE PORTO ALEGRE É
- EXP 021 DICTAMEN NÚM I2012067 H CONSEJO GENERAL UNIVERSITARIO
- CHARGE 320B — PAGE 5 OF 5 320 FALSE
- EMPANELMENT OF ADVERTISING AGENCIES APPLICATIONS ARE INVITED FROM REPUTED
- DEPOIS DE ANOS DE DEFLAÇÃO GALOPANTE O QUE SOBROU
- NO A LA ENTREGA DEL TRIGO FENALCE HTTPWWWLAREPUBLICACOMCONOTICIAPHP?IDNOTIWEB29618&IDSUBSECCION88&TEMPLATENOTICIA&FECHA200503021106AM
- TERCERA REUNIÓN ANUAL DEL FORO INTERAMERICANO SOBRE PARTIDOS POLÍTICOS
- TRIBUNALE DI MARSALA SEQUESTRO GIUDIZIARIO E RIDUZIONE DELLE DISPOSIZIONI
- AGENDUM OAKLAND UNIVERSITY BOARD OF TRUSTEES NOVEMBER 5 2003
- 12 CAMPOSCONVER LA CONVERSIÓN SIMPLE ORDINARIA Y MODAL DE
- NUMERICAL TOOLBOX FOR PRICING BINOMIAL TRINOMIAL TREES FINITE DIFFERENCE
- REPÚBLICA DE COLOMBIA PÁGINA 36 DE 36 CASACIÓN NO
- NORMATIVA SOBRE GARANTÍA Y CONSUMO ESTATAL
- TÍTULO DE LA COMUNICACIÓN INDICAR LÍNEA ESTRATÉGICA CON LA
- CÔNG TY CP PHẦN MỀM MELIASOFT MELIASOFT JOINT STOCK
- PEDAGOGÍA IGNACIANA UN PLANTEAMIENTO PRÁCTICO INDICE PÁGINA PROLOGO I
- KDO BO RAVNATELJ? V VASI HRUŠKA SO ZGRADILI NOVO
DE LA RECHERCHE DE LA VÉRITÉ (MALEBRANCHE) LIVRE
PROV2009140201 SENTENCIA EN LA VILLA DE MADRID A SEIS
 C ROSARIO 6 2º 1ª (EDIFICIO TOSCANA) ALBACETE 02001
 AVPDC18 PÁGINA 14 S AVPDC18 ORIGINAL INGLÉS FECHA 24
CV LISSI GAARNLARSEN FORNAVN EFTERNAVN LISSI GAARNLARSEN ADRESSE
THANKSGIVING POINT PRESENTS MINI MAKER FAIRE SEPTEMBER 15 YOUTUBE
REPUBLIKA SRBIJA CENTAR ZA SOCIJALNI RAD BROJ IV55118041507
35 KEEPING GOD’S DISTANCE SACRIFICE POSSESSION AND THE PROBLEM
 VIAŢA ŞI ACTIVITATEA PREACUVIOSULUI EGUMEN MACARIE TINCU DE LA
 SİNOP ÜNİVERSİTESİ TEKNİK ŞARTNAME DEĞERLENDİRME RAPORU FAKÜLTEYÜKSEKOKULENSTITÜBIRIM CIHAZALETMALZEME ADI
 UPPER YARRA DISTRICTS SPORTS ASSOCIATION CO ANDREW DEVISSER LAUNCHING
 ZOZNAM PRÁVNYCH PREDPISOV EÚ Z OBLASTI VODNÉHO HOSPODÁRSTVA K
 AGRADECIMIENTO PRIMERO QUE NADA A MI FAMILIA LA QUE
ORDINANCE NO 9701 (NS) AN ORDINANCE AMENDING SECTIONS 81312
 NORMATIVA DE GRUPOS DE INVESTIGACIÓN DE LA UNIVERSIDAD DE
JOB DESCRIPTION 1 POST DETAILS JOB TITLE COMMUNICATIONS ADMINISTRATOR
 HÖRNEFORS IF RUTINER OCH POLICIES RUTINER OCH POLICIES 3
 la Téléassistance Cest la Possibilité Pour L’abonné D’être Relié
CONVENÇÃO COLETIVA DE TRABALHO CATEGORIA ECONÔMICA SINDICATO DAS INDÚSTRIAS
ZAKON O ZAKLADAMA I FUNDACIJAMA I OPĆE ODREDBE ČLANAK
